Android Studio 3.6 (February 2020)
Android Studio 3.6 is a major release that includes a variety of new features and improvements.
We'd also like to thank all of our community contributors who have helped with this release.
3.6.3 (April 2020)
This minor update includes various bug fixes. To see a list of notable bug fixes, read the related post on the Release Updates blog.
3.6.2 (March 2020)
This minor update includes various bug fixes. To see a list of notable bug fixes, read the related post on the Release Updates blog.
3.6.1 (February 2020)
This minor update includes various bug fixes. To see a list of notable bug fixes, read the related post on the Release Updates blog.
Design tools
This version of Android Studio includes updates to several design tools, including the Layout Editor and Resource Manager.
Split view and zoom in design editors
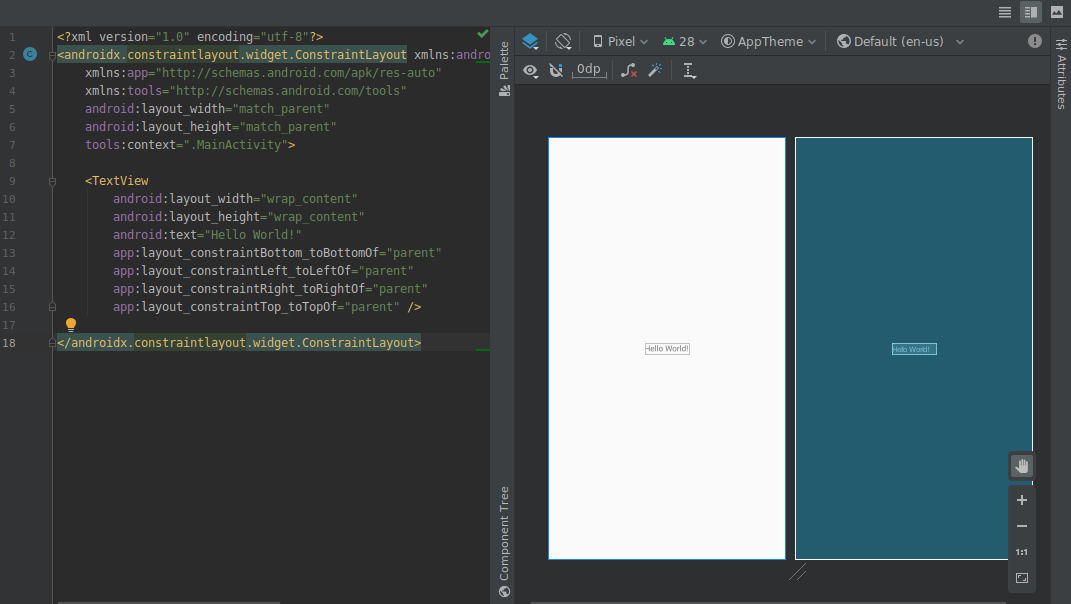
The following updates to the visual design editors are included in this release:
-
Design editors, such as the Layout Editor and Navigation Editor, now provide a Split view that enables you to see both the Design and Code views of your UI at the same time. In the top-right corner of the editor window, there are now three buttons
 for toggling between viewing options:
-
To enable split view, click the Split icon
 .
.
-
To enable XML source view, click the Source icon
 .
.
-
To enable design view, click the Design icon
 .
.
-
To enable split view, click the Split icon
-
The controls for zooming and panning within design editors have moved to a floating panel in the bottom-right corner of the editor window.
To learn more, see Build a UI with Layout Editor.
Color Picker Resource Tab
To help you quickly update color resource values in your app when you're using the color picker in your XML or the design tools, the IDE now populates color resource values for you.
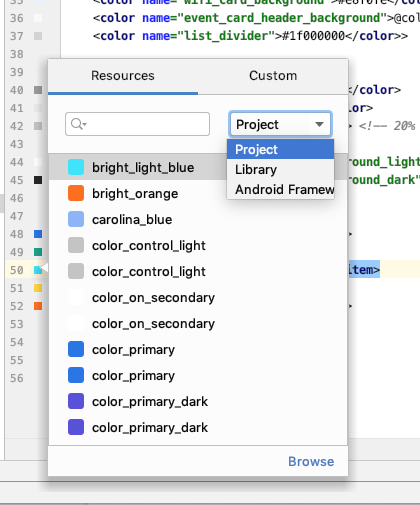
Resource Manager
The Resource Manager contains the following updates:
- The Resource Manager now supports most resource types.
- When searching for a resource, the Resource Manager now displays results from all project modules. Previously, searches returned results only from the selected module.
- The filter button lets you view resources from local dependent modules, external libraries, and the Android framework. You can also use the filter to show theme attributes.
- You can now rename resources during the import process by clicking within the textbox above the resource.
To learn more, see Manage your app's UI resources with Resource Manager.
Updates to the Android Gradle plugin
The latest version of the Android Gradle plugin includes many updates, including optimizations for build speed, support for the Maven publishing plugin, and support for View Binding. To learn more, read the full release notes.
View binding
View binding allows you to more easily write code that interacts with views by generating a binding class for each XML layout file. These classes contain direct references to all views that have an ID in the corresponding layout.
Because it replaces findViewById(), view binding eliminates
the risk of null pointer exceptions resulting from an invalid view ID.
To enable view binding, you need to use Android Gradle plugin
3.6.0 or higher and include the following in each module's
build.gradle file:
Groovy
  android {
      buildFeatures.viewBinding = true
  }
Kotlin
  android {
      buildFeatures.viewBinding = true
  }
Apply Changes
You can now add a class and then deploy that code change to your running app by clicking either Apply Code Changes or Apply Changes and Restart Activity .
To learn more about the difference between these two actions, see Apply Changes.
Refactor menu option to enable Instant Apps support
You can now instant-enable your base module at any time after creating your app project as follows:
- Open the Project panel by selecting View > Tool Windows > Project from the menu bar.
- Right-click on your base module, typically named 'app', and select Refactor > Enable Instant Apps Support.
- In the dialog that appears, select your base module from the dropdown menu.
- Click OK.
Note:The option to instant-enable your base app module from the Create New Project wizard has been removed.
To learn more, read Overview of Google Play Instant.
Deobfuscate class and method bytecode in APK Analyzer
When using the APK Analyzer to inspect DEX files, you can deobfuscate class and method bytecode as follows:
- Select Build > Analyze APK from the menu bar.
- In the dialog that appears, navigate to the APK you want to inspect and select it.
- Click Open.
- In the APK Analyzer, select the DEX file you want to inspect.
- In the DEX file viewer, load the ProGuard mappings file for the APK you’re analyzing.
- Right-click on the class or method you want to inspect and select Show bytecode.
Native tooling
The following updates support native (C/C++) development in Android Studio.
Kotlin support
The following NDK features in Android Studio, previously supported in Java, are now also supported in Kotlin:
-
Navigate from a JNI declaration to the corresponding implementation function in C/C++. View this mapping by hovering over the C or C++ item marker near the line number in the managed source code file.
-
Automatically create a stub implementation function for a JNI declaration. Define the JNI declaration first and then type “jni” or the method name in the C/C++ file to activate.

-
Unused native implementation functions are highlighted as a warning in the source code. JNI declarations with missing implementations are also highlighted as an error.
-
When you rename (refactor) a native implementation function, all corresponding JNI declarations are updated. Rename a JNI declaration to update the native implementation function.
-
Signature checking for implicitly-bound JNI implementations.
Other JNI improvements
The code editor in Android Studio now supports a more seamless JNI development workflow, including improved type hints, auto-completion, inspections, and code refactoring.
APK reloading for native libraries {:#3.6-reload-apk}
You no longer need to create a new project when the APK in your project is updated outside the IDE. Android Studio detects changes in the APK and gives you the option to re-import it.

Attach Kotlin-only APK sources
It is now possible to attach Kotlin-only external APK sources when you profile and debug pre-built APKs. To learn more, see Attach Kotlin/Java sources.
Leak detection in Memory Profiler
When analyzing a heap dump in the Memory Profiler, you can now filter profiling
data that Android Studio thinks might indicate memory leaks for Activity and
Fragment instances in your app.
The types of data that the filter shows include the following:
-
Activityinstances that have been destroyed but are still being referenced. -
Fragmentinstances that do not have a validFragmentManagerbut are still being referenced.
In certain situations, such as the following, the filter might yield false positives:
- A
Fragmentis created but has not yet been used. - A
Fragmentis being cached but not as part of aFragmentTransaction.
To use this feature, first capture a heap dump or import a heap dump file into Android Studio. To display the fragments and activities that may be leaking memory, select the Activity/Fragment Leaks checkbox in the heap dump pane of the Memory Profiler.

Filtering a heap dump for memory leaks.
Emulators
Android Studio 3.6 helps you take advantage of several updates included in Android Emulator 29.2.7 and higher, as described below.
Improved Location Support
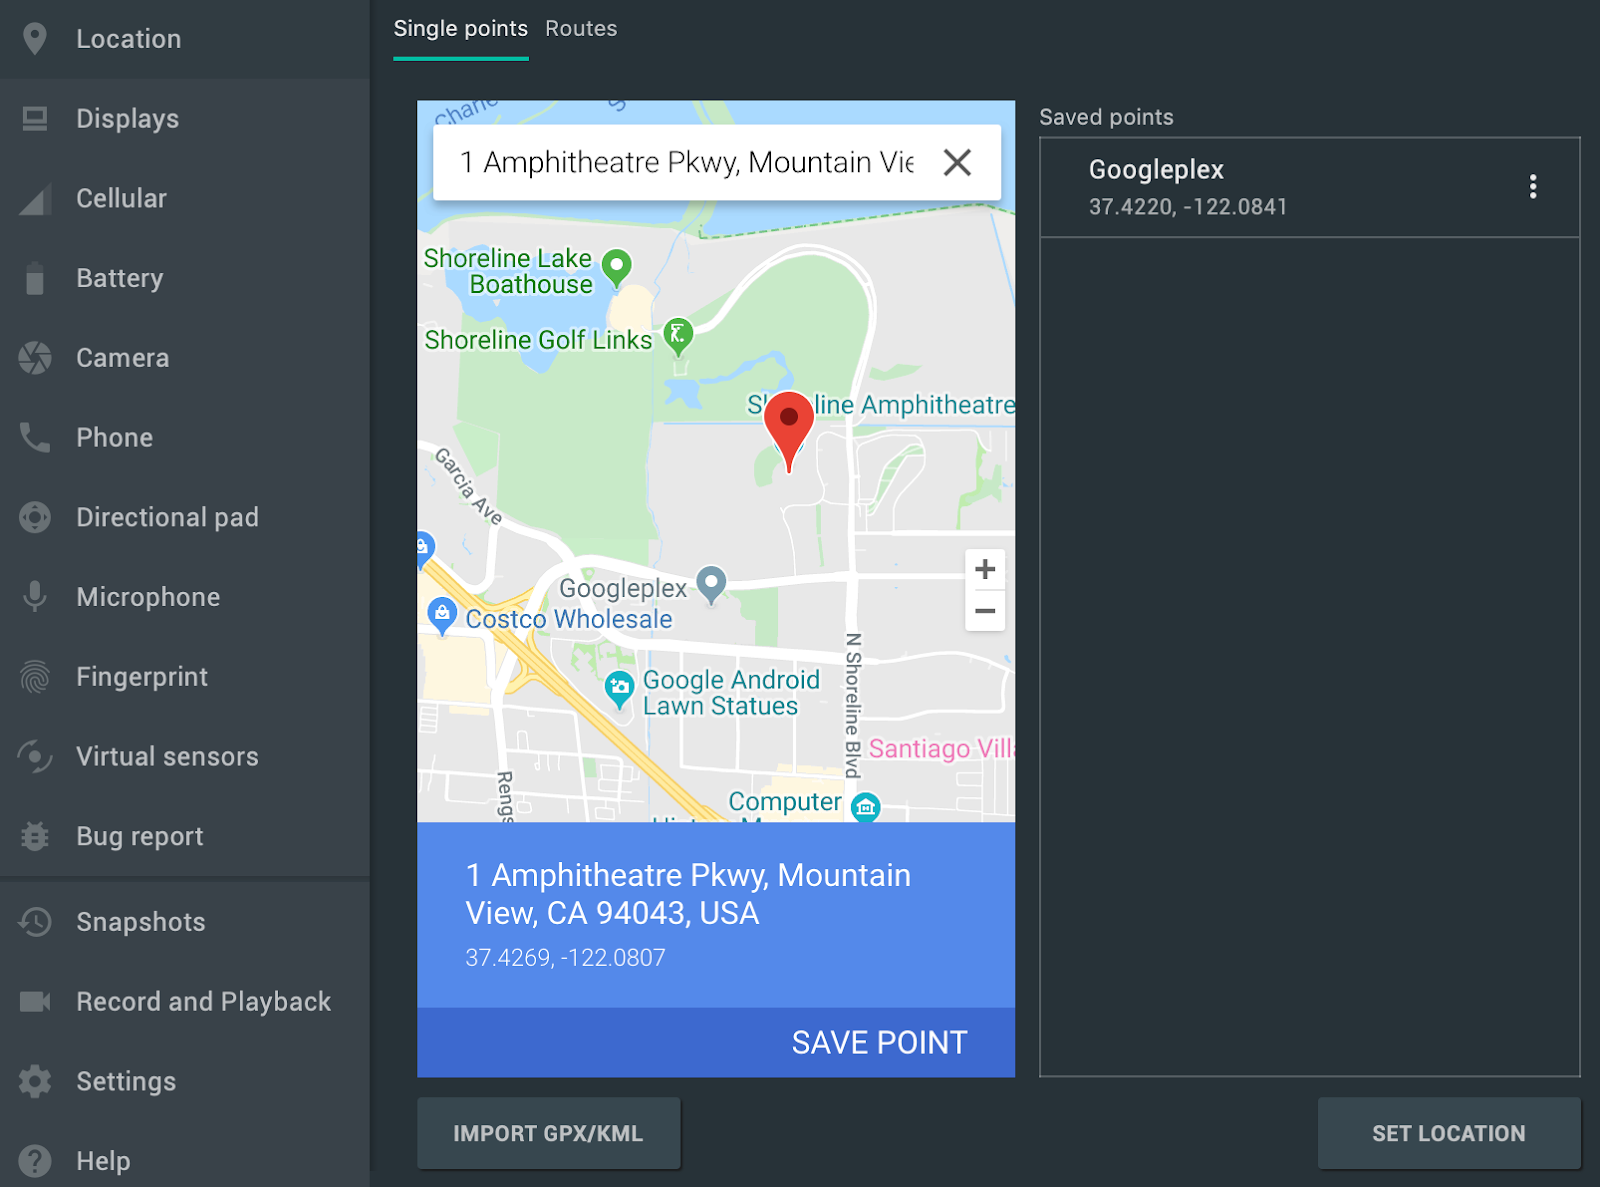
Android Emulator 29.2.7 and higher provides additional support for emulating GPS coordinates and route information. When you open the Emulators Extended controls, options in the Location tab are now organized under two tabs: Single points and Routes.
Single points
In the Single points tab, you can use the Google Maps webview to search for points of interest, just as you would when using Google Maps on a phone or browser. When you search for or click on a location in the map, you can save the location by selecting Save point near the bottom of the map. All of your saved locations are listed on the right side of the Extended controls window.
To set the Emulators location to the location you have selected on the map, click the Set location button near the bottom right of the Extended controls window.
 .
.
Routes
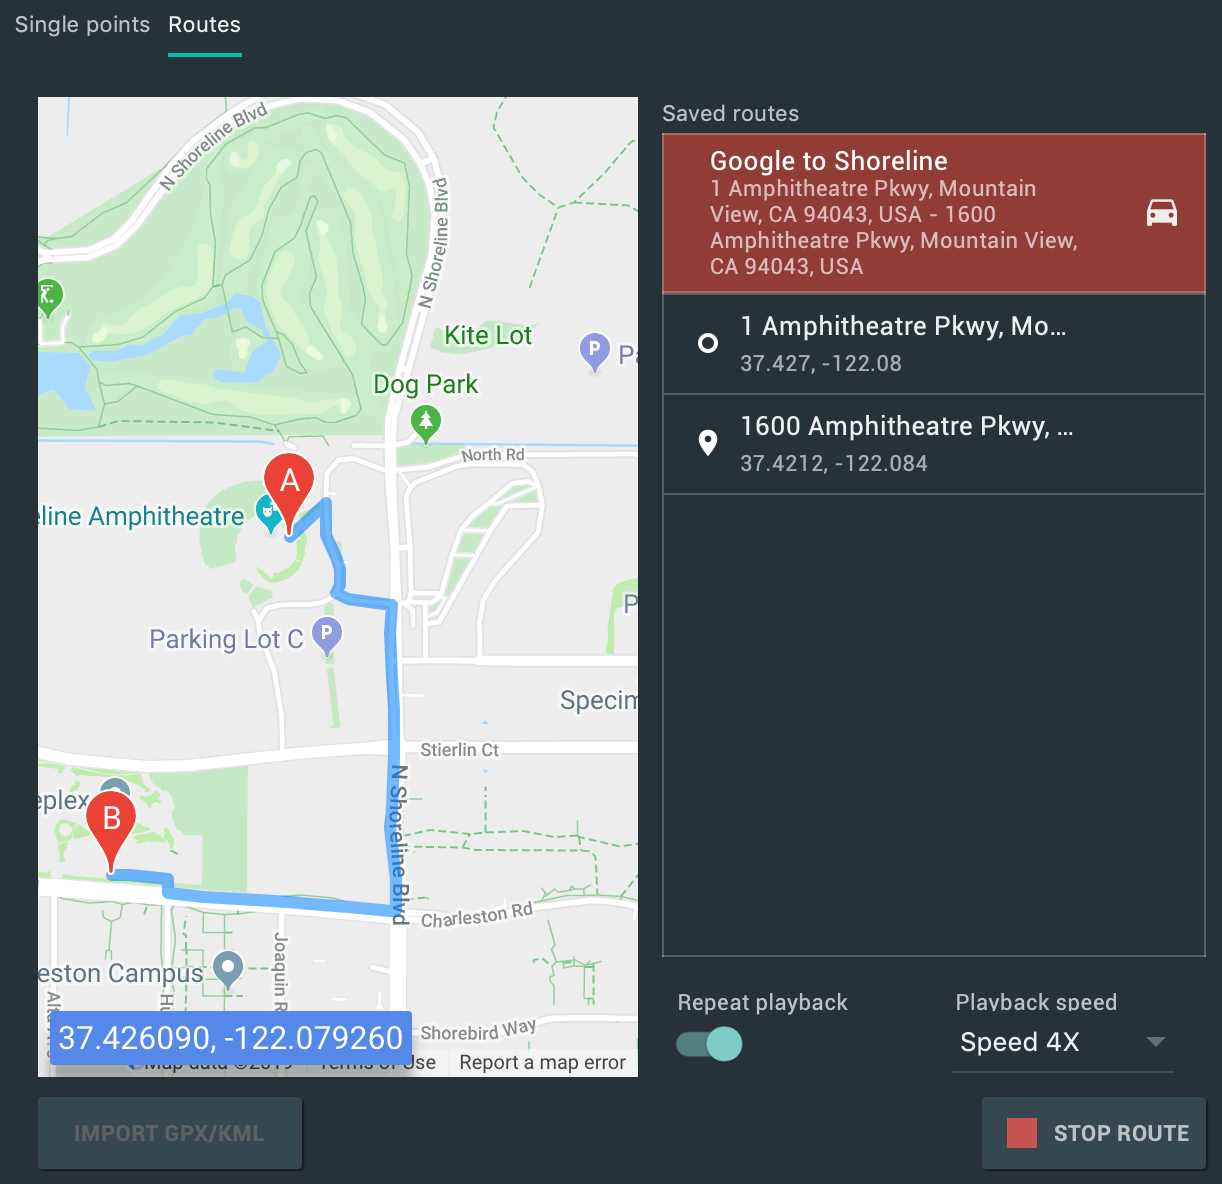
Similar to the Single points tab, the Routes tab provides a Google Maps webview that you can use to create a route between two or more locations. To create and save a route, do the following:
- In the map view, use the text field to search for the first destination in your route.
- Select the location from the search results.
- Select the Navigate button.
- Select the starting point of your route from the map.
- (Optional) Click Add destination to add additional stops to your route.
- Save your route by clicking Save route in the map view.
- Specify a name for the route and click Save.
To simulate the Emulator following the route you saved, select the route from the list of Saved routes and click Play route near the bottom right of the Extended controls window. To stop the simulation, click Stop route.
 .
.
To continuously simulate the Emulator following the specified route, enable the switch next to Repeat playback. To change how quickly the Emulator follows the specified route, select an option from the Playback speed dropdown.
Multi-display support
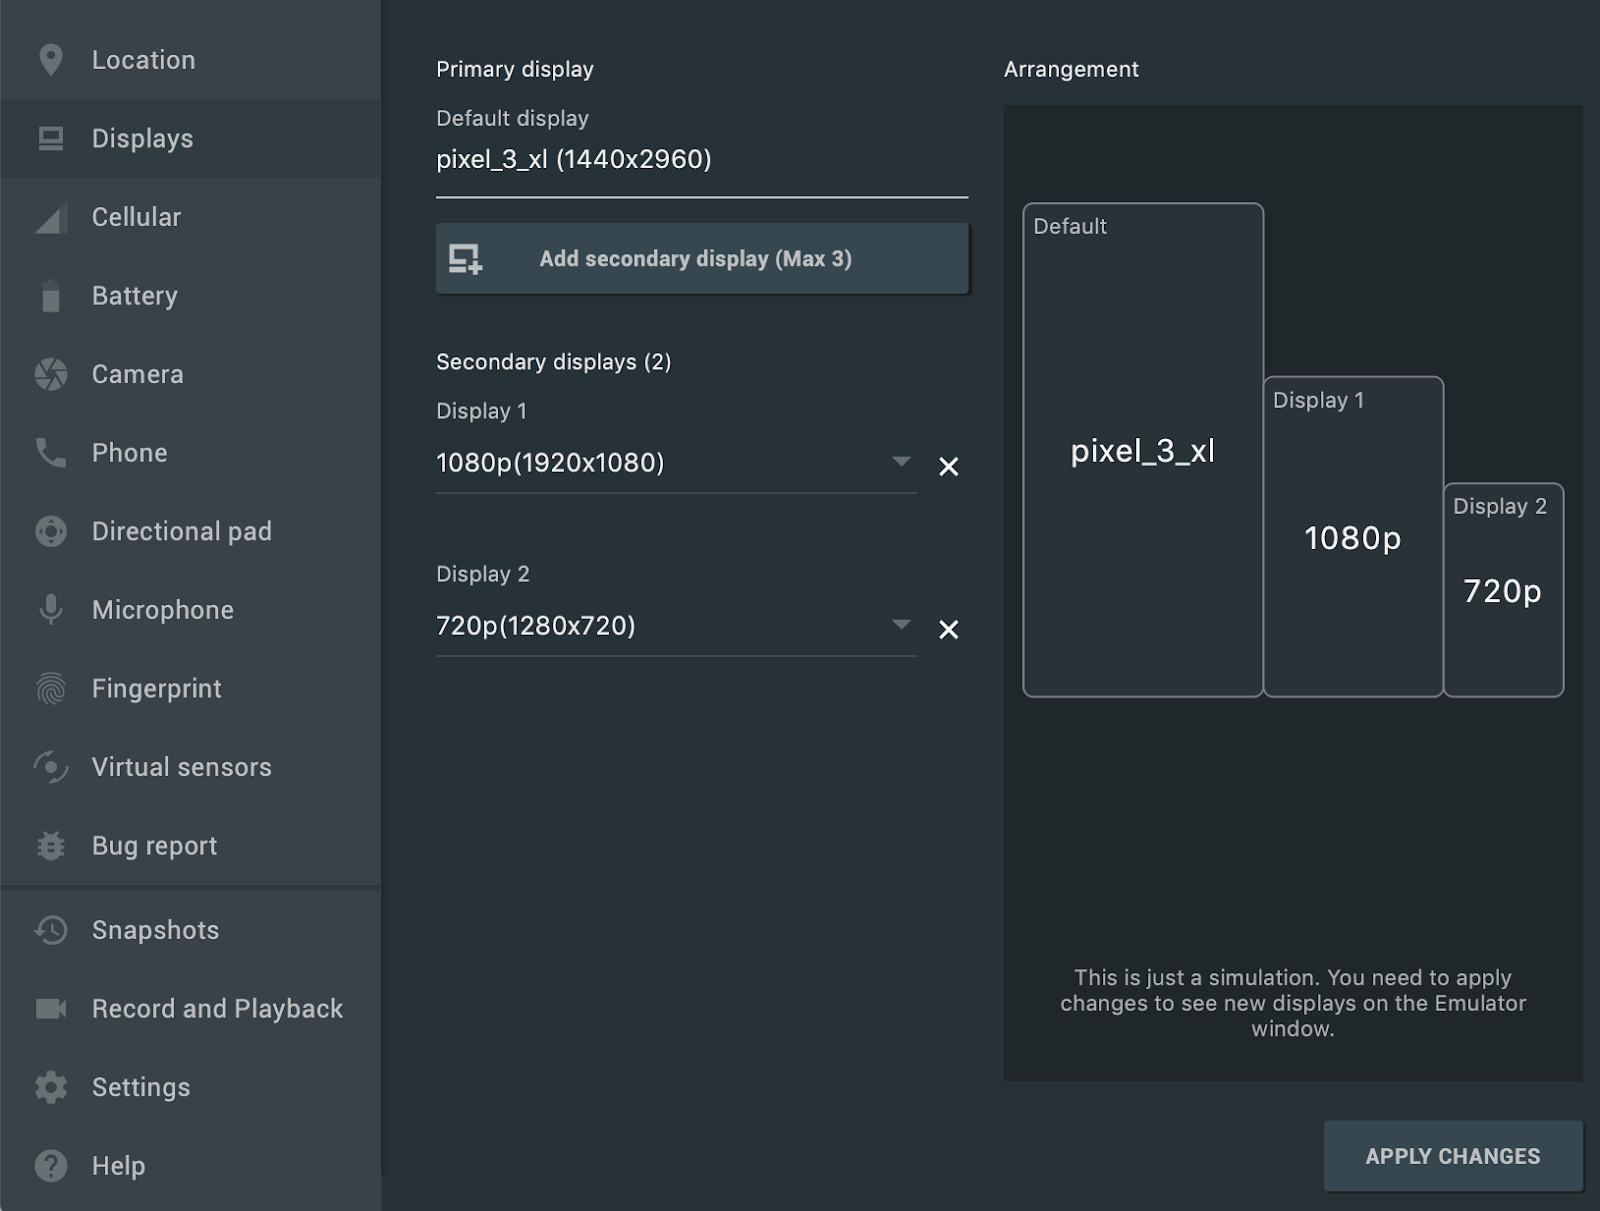
The Android Emulator now allows you to deploy your app to multiple displays, which support customizable dimensions and can help you test apps that support multi-window and multi-display. While a virtual device is running, you can add up to two additional displays as follows:
-
Open the Extended controls and navigate to the Displays tab.
-
Add another display by clicking Add secondary display.
-
From the dropdown menu under Secondary displays, do one of the following:
-
Select one of the preset aspect ratios
-
Select custom and set the height, width, and dpi for your custom display.
-
(Optional) Click Add secondary display to add a third display.
-
Click Apply changes to add the specified display(s) to the running virtual device.
New virtual devices and project templates for Android Automotive OS
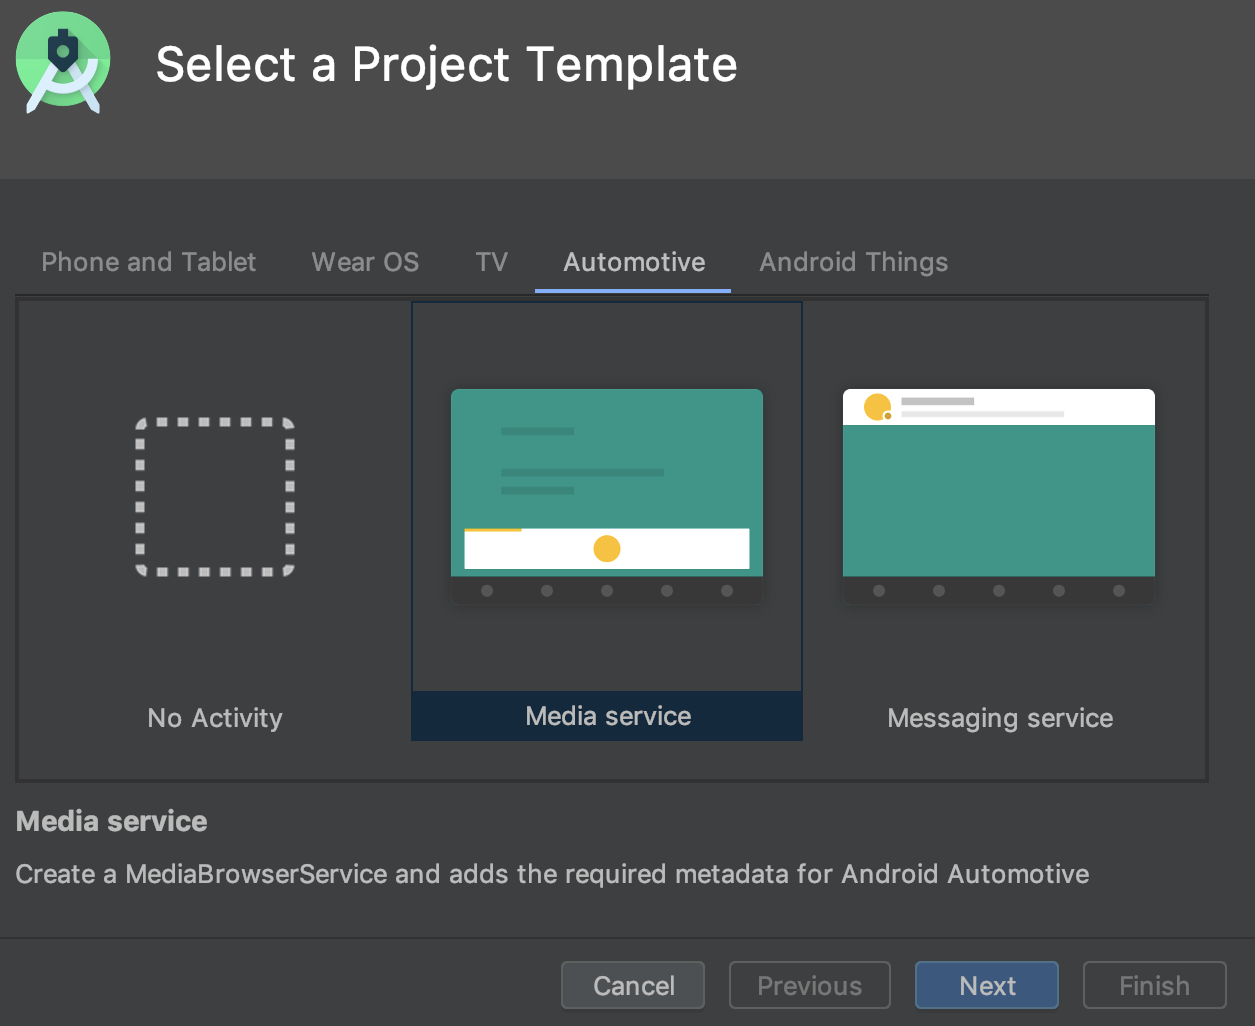
When you create a new project using Android Studio, you can now select from three templates from the Automotive tab in the Create New Project wizard: No Activity, Media service, and Messaging service. For existing projects, you can add support for Android Automotive devices by selecting File > New > New Module from the menu bar, and selecting Automotive Module. The Create New Module wizard then guides you through creating a new module using one of the Android Automotive project templates.
 .
.
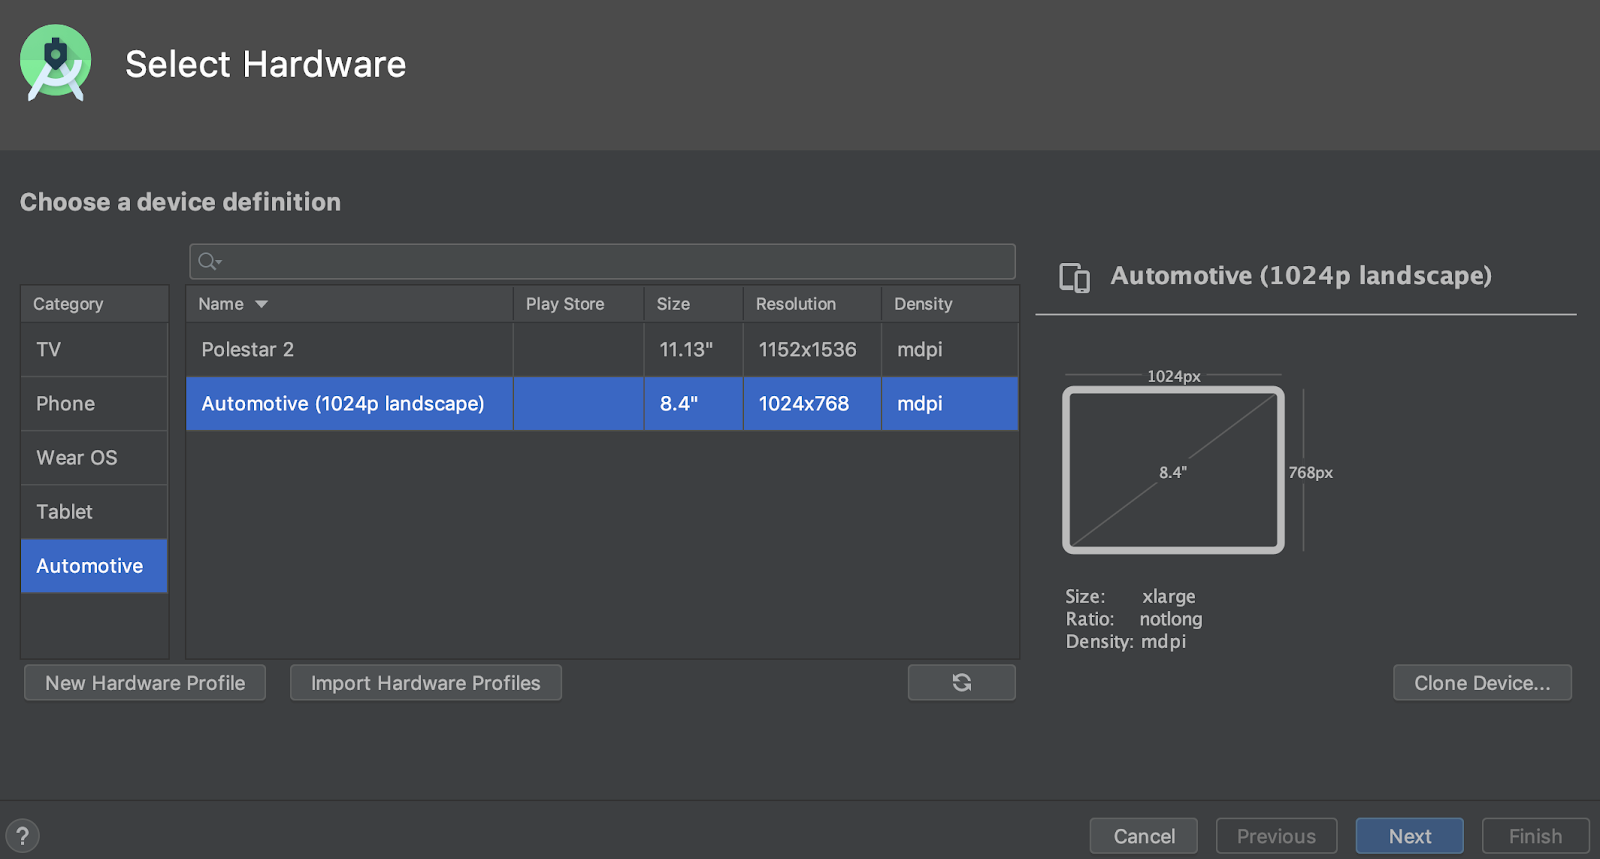
Additionally, you can now create an Android Virtual Device (AVD) for Android Automotive OS devices by selecting one of the following options in the Automotive tab in the Virtual Device Configuration wizard.
- Polestar 2: Create an AVD that emulates the Polestar 2 head unit.
- Automotive (1024p landscape): Create an AVD for generic 1024 x 768 px Android Automotive head units.
 .
.
Resumable SDK downloads
When downloading SDK components and tools using the SDK Manager, Android Studio now allows you to resume downloads that were interrupted (for example, due to a network issue) instead of restarting the download from the beginning. This enhancement is especially helpful for large downloads, such as the Android Emulator or system images, when internet connectivity is unreliable.
In addition, if you have an SDK download task running in the background, you can now pause or resume the download using the controls in the status bar.

A background download task in the status bar with new controls that let you pause or resume the download.
Win32 deprecated
The Windows 32-bit version of Android Studio will no longer receive updates after December 2019, and it will no longer receive support after December 2020. You can continue to use Android Studio. However, to receive additional updates, upgrade your workstation to a 64-bit version of Windows.
To learn more, read the Windows 32-bit depreciation blog
New option for optimizing Gradle sync time
In previous releases, Android Studio retrieved the list of all Gradle tasks during Gradle Sync. For large projects, retrieving the task list could cause slow sync times.
To improve Gradle Sync performance, go to File > Settings > Experimental and select Do not build Gradle task list during Gradle sync.
When you enable this option, Android Studio skips building the task list during sync, which allows Gradle Sync to complete faster and improves UI responsiveness. Keep in mind, when the IDE skips building the task list, the task lists in the Gradle panel are empty, and task name auto-completion in build files does not work.
New location to toggle Gradle's offline mode
To enable or disable Gradle's offline mode, first select
View > Tool Windows > Gradle from the menu bar. Then, near the top of
the Gradle window, click Toggle Offline Mode
 .
.
IntelliJ IDEA 2019.2
The core Android Studio IDE has been updated with improvements from IntelliJ IDEA through the 2019.2 release.
To learn more about the improvements from other IntelliJ versions that are included cumulatively with version 2019.2, see the following pages:
Community contributors
Thank you to all of our community contributors who have helped us discover bugs and other ways to improve Android Studio 3.6. In particular, we'd like to thank the following people who reported bugs:
|
|
|
|
