1. Exposing your Data to Complications
This codelab will teach you how to build a complication data source.
Concepts and setup
At the end of the codelab, you will understand how to provide your data to watch face complications on Wear OS.
Concepts
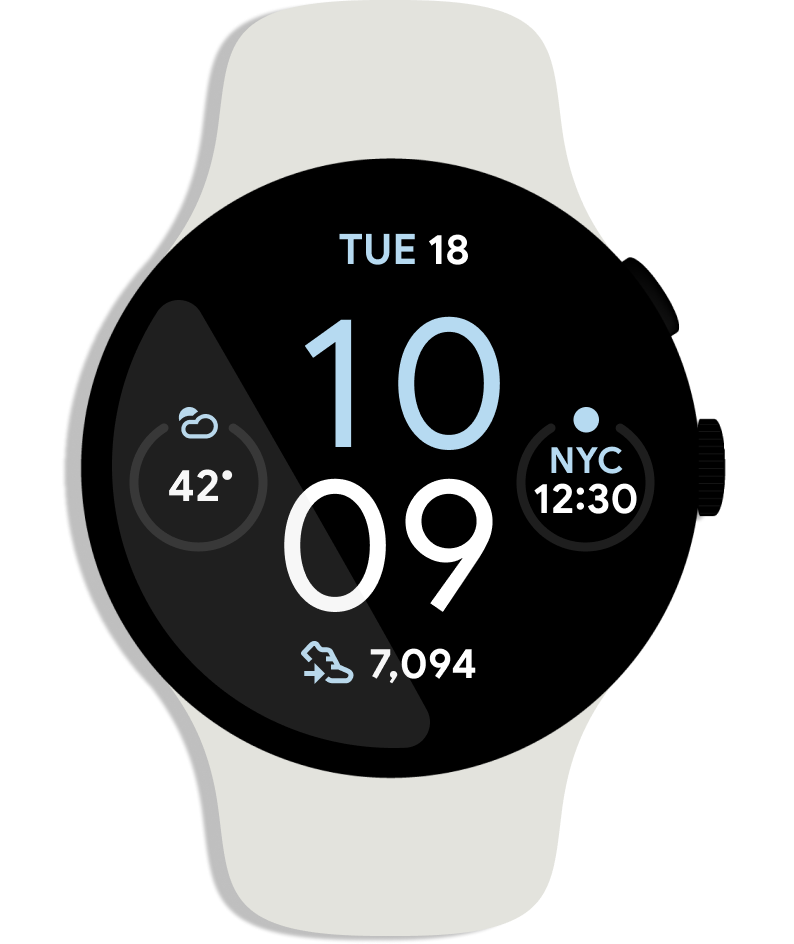
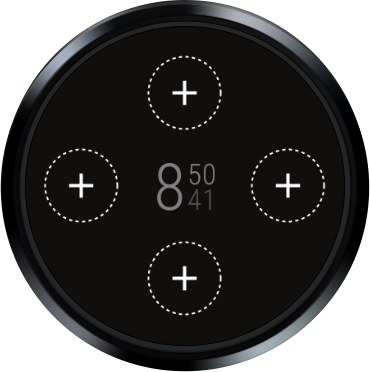
A complication is a feature of a watch face beyond hours and minutes. As an example, the watch face on the image below contains four complications.
The Complications API is meant for both watch faces and data source apps:
- Complication data sources supply data, e.g., battery-level, weather, step-count, etc.
- Watch face developers can display that data in a complication on their watch face
- The user selects which data sources they want for their complications
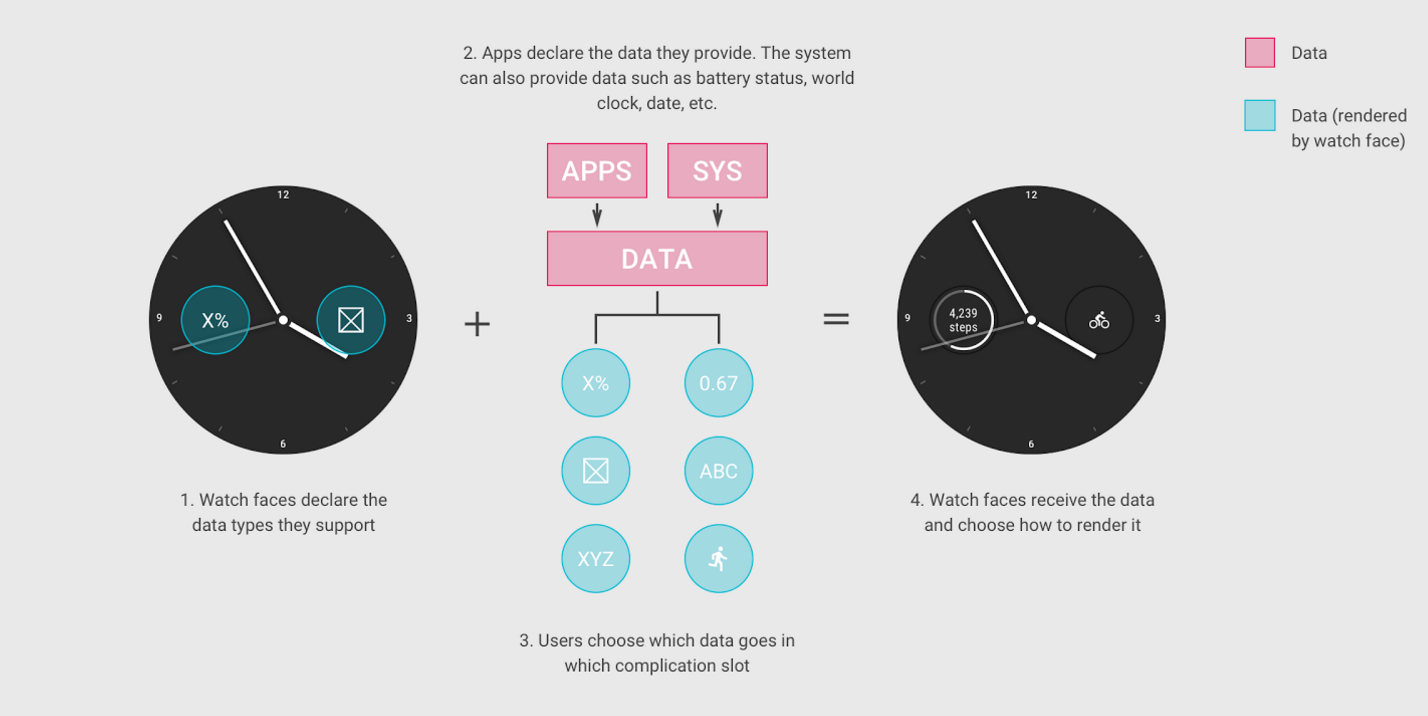
In this code lab, we cover creating a complication data source. If you are also interested in adding complications to a watch face, check out our watch face sample.
Let's get started!
Clone the starter project repo
To help you get started quickly, we have prepared a project for you to build on. It contains some basic code and application settings necessary for the code lab.
If you have Git installed, run the command below. (You can check if Git is installed by typing git --version in the terminal / command line and verify that it executes correctly.):
git clone https://github.com/android/codelab-complications-data-source.git
If you do not have Git, you can download the project as a zip file:
Import the project
Start Android Studio and select "Open an existing Android Studio project" from the Welcome screen. Open the project directory and double-click the build.gradle file in the complications-data-source directory.
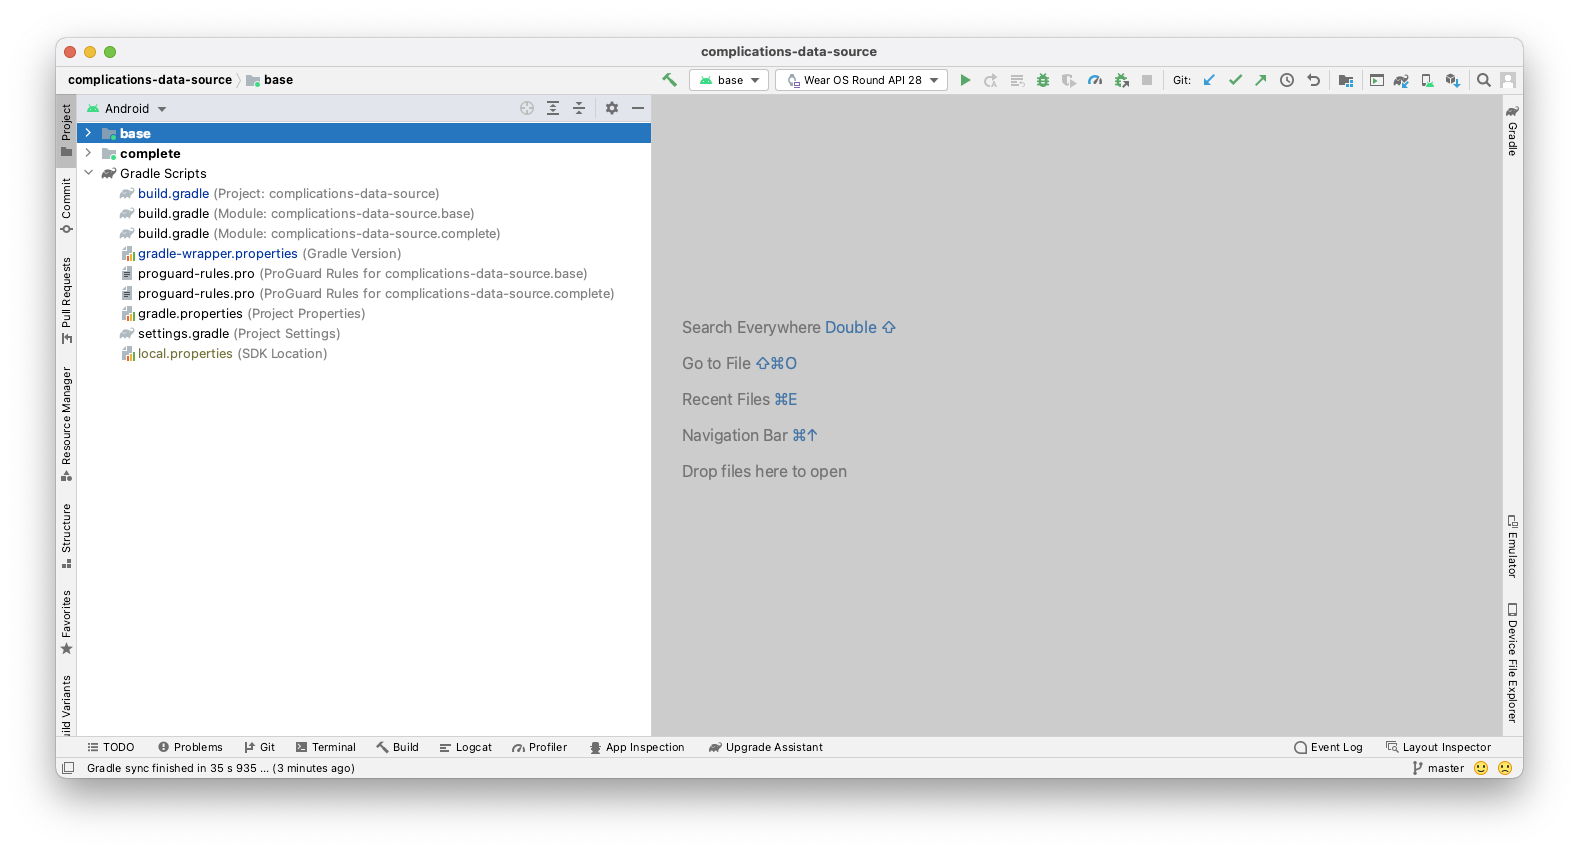
In the upper-left corner of the project window, if you are in the Android view, you should see a set of folder icons similar to those in the screenshot below. (If you are in the Project view, expand the complications-data-source project to see the set of folder icons.)

There are two folder icons. They both represent a module. Please note that Android Studio might take several seconds to compile the project in the background for the first time. During this time you will see a spinner in the status bar at the bottom of Android Studio:

Wait until the processes have finished before making code changes, to allow Android Studio to pull in all the necessary components..
Understand the starter project
You're set up and ready to start exposing your data to complications. We'll begin with the base module. You will add code from each step to base.
You can use the complete module in the codelab as a reference point to check your work (or as a reference if you encounter an issue).
Overview of key components for data sources
ComplicationTapBroadcastReceiver- The class used to update our complication data through aPendingIntent.CustomComplicationDataSourceService- The class used to expose our data to complications. The file is in the directorybase/java/com/example/android/wearable/complicationsdatasource. In Android Studio, this is located underbase/java/com.example.android.wearable.complicationsdatasource. Within the class, we will mainly work on four methods:onComplicationActivated- Called when a complication has been activated with your data.getPreviewData- Preview data for a complication used in the editor UI (usually just static content).onComplicationRequest- The majority of our work will be in this method. This method is called whenever an active complication needs updated data from your source.onComplicationDeactivated- Called when the complication has been deactivated.
Emulator setup
If you need help setting up a Wear OS emulator, please refer to the "Launch the emulator and run your Wear app" section of the "Creating and Running a Wearable App" page.
Run the starter project
Let's run the app on a watch.
- Connect your Wear OS device or start an emulator.
- In the toolbar, select the "base" configuration from the drop-down selector and click the green triangle (Run) button next to it:
- If you get an error like the one below (Error Launching activity), change the default launch
Activity(instructions below).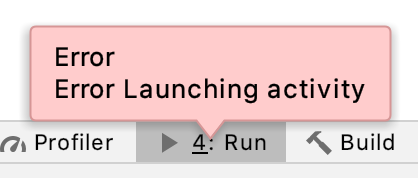
Conversely, if prompted for the Activity to use when launching the app, choose "Do not launch Activity".
- To change the default launch
Activity(if necessary, from the previous step), click the drop-down selector to the left of the green arrow and click "edit configurations".

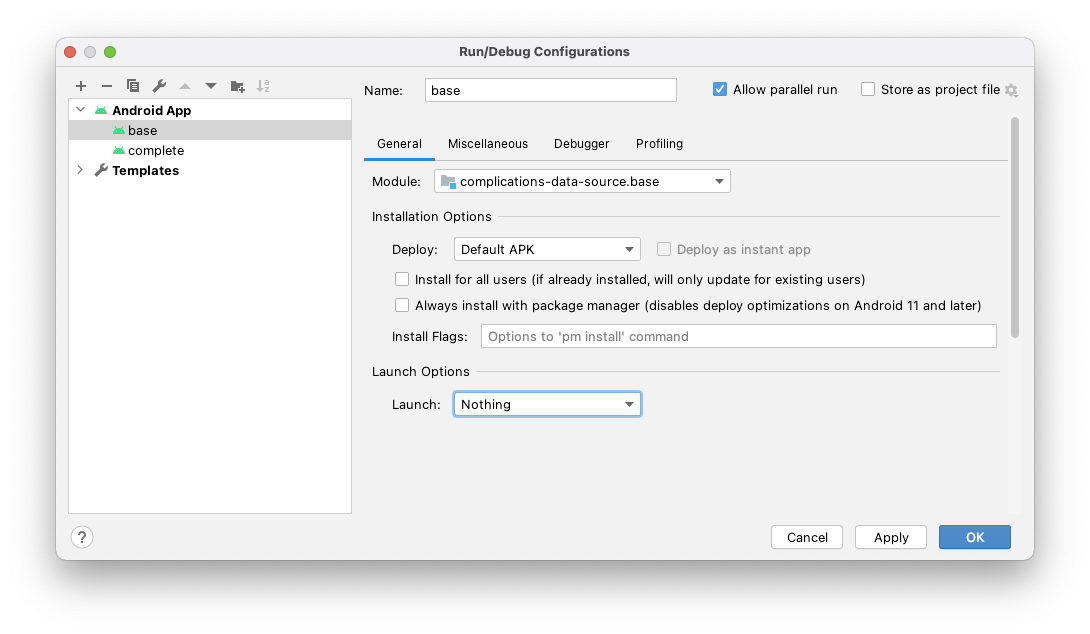
Select "base" and you will see a window similar to the one below. Select "Nothing" under the Launch Options section and click Run. Later, if you want to try launching the other module, you will need to do this as well.
- Select your Android device or emulator and click OK. This will install the service on the Wear OS device or emulator.
- After a couple of seconds, your service is built and ready to deploy. You will see a spinner in the status bar at the bottom of Android Studio.
- If it is not already at the "Build" tab at the bottom-left of Android Studio, select that tab and you can see the installation progress. At the end of the installation process, you should see the message "Build: completed successfully".
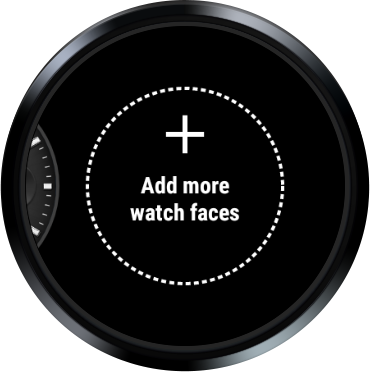
- Choose a watch face that lets you select a complication. In our case, we chose Elements Digital but that might not be available on your watch.
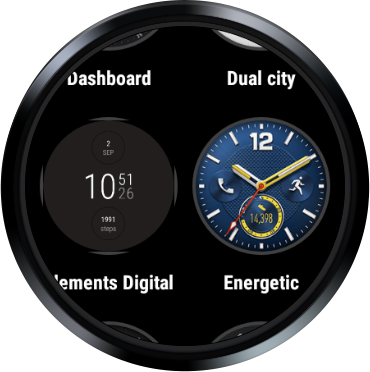
Please note, since this is the first time you are running this watch face, you will need to select it from "Add more watch faces". After it has been selected once, it will show up as one of the options alongside this option.
- Now you should be centered on your chosen watch face in the Favorite menu (see image below). Click on the gear icon at the bottom.
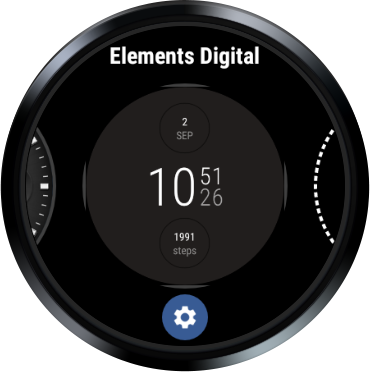
- For this watch face, you should select Data. For the custom watch face you are using, the UI may be different.
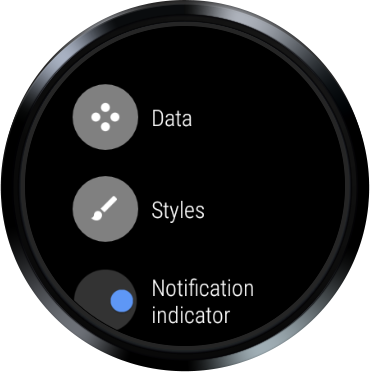
- Select any position, that is, any "+" (complication).
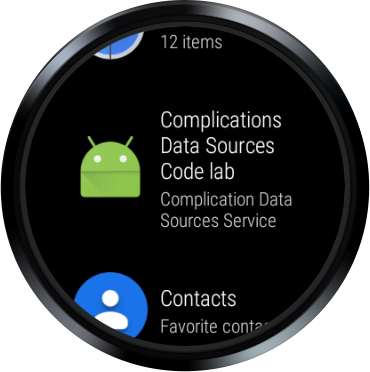
- Finally, scroll down and select the service Complications Data Source Codelab. (After you select it, you may need to swipe left several times or palm the device to exit.)
- In your output, you should see both "
onComplicationActivated()" and "onComplicationRequest()" log messages (though nothing will show in the complication location). - If you do not see the log messages, try deploying the watch face again by pressing the green triangle button in the toolbar.
- If you aren't familiar with how to see
Logdata, click the tab at the bottom of Android Studio labeled "6: Logcat". Set the dropdowns to your device/emulator and the package name,com.example.android.wearable.complicationsdatasource(a screenshot is below).

"But wait! Nothing is being displayed in the data slot I selected!" Don't worry, we aren't supplying any data yet. We will add this in the next step.
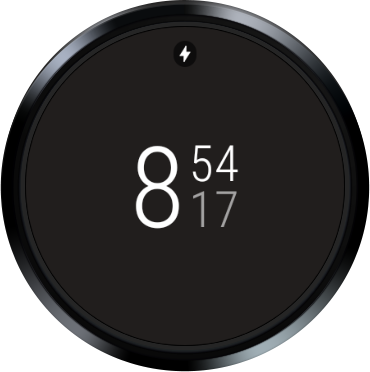
On some watches, the Elements Watch Face has complications enabled, so you might see a populated complication on your watch. Also, don't worry if your emulator has a cloud with a strikethrough in place of the airplane icon. We will not need a connection to a phone or the internet for this code lab.
Summary
In this step you've learned about:
- Wear OS and the concepts behind exposing data to complications
- The basics of our starting point (base module)
- Deploy and run a watch face
Next up
Let's start exposing some data.
2. Exposing Short Text Data
Code step 2
In this step, we will start exposing data. Complications accept several types of data. In this step, we will return the Short Text data type.
If at any point you are confused by the concepts discussed here, please refer to the complete module and see how these steps may be implemented.
Specifying the data types your data source supports
Open the AndroidManifest.xml file and look at the service CustomComplicationDataSourceService . Notice the intent-filter:
<action android:name=
    "android.support.wearable.complications.ACTION_COMPLICATION_UPDATE_REQUEST"/>
This tells the system that your service extends either ComplicationDataSourceService or SuspendingComplicationDataSourceService (variation that supports Kotlin Coroutines) and can send data for complications.
Next is the meta-data element specifying the data type(s) we support. In this case, we support SMALL_IMAGE, but for this step, change that to SHORT_TEXT. Change your first meta-data element to the following:
<meta-data
    android:name="android.support.wearable.complications.SUPPORTED_TYPES"
    android:value="SHORT_TEXT"/>
Exposing your data
As stated earlier, onComplicationActivated() is called when your data source is activated. This is a good place/time to perform any basic setup that needs to be done once per activation. We aren't doing that in this code lab, since our sample is relatively simple.
The onComplicationRequest()call is where the active complication requests updated data.
The method onComplicationRequest() is triggered for various reasons:
- An active watch face complication is changed to use this source
- A complication using this source becomes active
- You triggered an update from your own class via either
ComplicationDataSourceUpdateRequester.requestUpdate()orComplicationDataSourceUpdateRequester.requestUpdateAll(). - The period of time you specified in the manifest has elapsed
Open CustomComplicationDataSourceService .kt and move the cursor down to the onComplicationRequest() method. Delete the line, "return null" and then copy and paste the code below under the initial Log.d() call:
// Retrieves your data, in this case, we grab an incrementing number from Datastore.
val number: Int = applicationContext.dataStore.data
    .map { preferences ->
        preferences[TAP_COUNTER_PREF_KEY] ?: 0
    }
    .first()

val numberText = String.format(Locale.getDefault(), "%d!", number)
In this case, we are retrieving a stored int from the DataStore that represents our data. This could easily be a call to your database.
Interacting with a DataStore requires a coroutine to handle collecting the Flow it produces. You might notice that onComplicationRequest() is a suspend function, so we can collect our data via Flow without specifically launching a coroutine.
After retrieving the integer value, we convert it to a simple string in preparation for converting it to a ComplicationData object, that is, a data type the complication understands.
Next, copy and paste the code below the code you just added..
return when (request.complicationType) {

    ComplicationType.SHORT_TEXT -> ShortTextComplicationData.Builder(
        text = PlainComplicationText.Builder(text = numberText).build(),
        contentDescription = PlainComplicationText
            .Builder(text = "Short Text version of Number.").build()
    )
        .build()

    else -> {
        if (Log.isLoggable(TAG, Log.WARN)) {
            Log.w(TAG, "Unexpected complication type ${request.complicationType}")
        }
        null
    }
}
In this code, we return a ComplicationData object based on the complication type, that is, we will return a ShortTextComplicationData (a subclass of ComplicationData) for the data type SHORT_TEXT.
A given data type may include different fields. For example, SHORT_TEXT may be just a single piece of text, or a title and text, or a monochromatic image and text (all which should include a content description for accessibility).
For our case, we are only setting the required field and no optional fields. To learn more about these types and fields, review our documentation.
You may ask why we are using a when statement to create the data. Later, we will support various forms of the data based on the type the system is requesting. By using a when statement now, we can easily add new data types (LONG_TEXT, RANGED_VALUE, etc.) later.
Finally, we return null if we don't support the data type.
Your final method should look like this:
override suspend fun onComplicationRequest(request: ComplicationRequest): ComplicationData? {
    Log.d(TAG, "onComplicationRequest() id: ${request.complicationInstanceId}")

    // Retrieves your data, in this case, we grab an incrementing number from Datastore.
    val number: Int = applicationContext.dataStore.data
        .map { preferences ->
            preferences[TAP_COUNTER_PREF_KEY] ?: 0
        }
        .first()

    val numberText = String.format(Locale.getDefault(), "%d!", number)

    return when (request.complicationType) {

        ComplicationType.SHORT_TEXT -> ShortTextComplicationData.Builder(
            text = PlainComplicationText.Builder(text = numberText).build(),
            contentDescription = PlainComplicationText
                .Builder(text = "Short Text version of Number.").build()
        )
            .build()

        else -> {
            if (Log.isLoggable(TAG, Log.WARN)) {
                Log.w(TAG, "Unexpected complication type ${request.complicationType}")
            }
            null
        }
    }
}
Run the app again
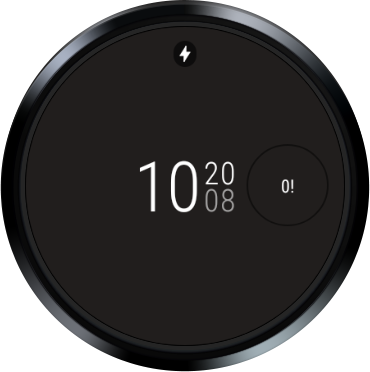
In the first step, you learned to install your complication data service on your device or emulator. Now it's time to do that again! Install your app and reselect the complication, i.e., swipe the watch face, select the gear, navigate to the same complication, and select the Complications Data Source Codelab. You should see something like this:
Summary
In this step you've learned:
- How to specify the data types your source can support
- How often your data should be requested when an active complication is using it
- Where to expose your data to Wear OS
Next up
Let's try supporting a different data type.
3. Triggering Complication Data Updates
Code step 3
In this step, we will trigger updates in the data when the user taps our complication.
If at any point you are confused by the concepts discussed here, please refer to the complete module and see how these steps may be implemented.
Specifying how often the complication should refresh your data
Open the AndroidManifest.xml file and look again at the service CustomComplicationDataSourceService .
Notice an UPDATE_PERIOD_SECONDS field in the meta-data element. This specifies how often you want the system to check for updates to the data when your data source is active.
Right now, it is set to 600 seconds (10 minutes). Because we want to update our complication in response to a user action, we want to update more frequently. While we could decrease this period, the system may not trigger updates for periods shorter than a couple of minutes.
A better approach is a "push style" where we tell the system to update precisely when the data has changed.
Change the update frequency from 600 to 0, which indicates that we will directly ping the system when data has changed instead of relying on periodic updates. Note that the meta-data is a requirement.
<meta-data
    android:name="android.support.wearable.complications.UPDATE_PERIOD_SECONDS"
    android:value="0"/>
Informing the system that new complication data is available
Open ComplicationTapBroadcastReceiver.kt. This BroadcastReceiver class will update our complication data when it's triggered. (Remember we are just saving the data to a DataStore.)
The class also offers a helper method that constructs a PendingIntent (triggers it as a BroadcastReceiver).
Right now the onReceive() method, extracts the data source and complication id from the intent and updates the integer in DataStore. We need to tell our complication that the data has been updated.
Move to the bottom of the onReceive() method. Above the finally block, you should see a comment "Request an update for the..." Copy and paste the code below that comment.
// Request an update for the complication that has just been tapped, that is,
// the system call onComplicationUpdate on the specified complication data
// source.
val complicationDataSourceUpdateRequester =
    ComplicationDataSourceUpdateRequester.create(
        context = context,
        complicationDataSourceComponent = dataSource
    )
complicationDataSourceUpdateRequester.requestUpdate(complicationId)
This instructs Wear OS that our complication's data has been updated. We need three pieces of data for this to work:
- context -
Contextis available as an argument for this method:onReceive(). - complicationDataSourceComponent - The
DataSourceof your complication is passed in as anExtrafrom thePendingIntentthat triggers thisBroadcastReceiver. - complicationId - The unique integer assigned by a watch face for the complication location. The
intis passed in as anExtrafrom thePendingIntentthat triggers thisBroadcastReceiver.
We are done with this step and your final method should look like this:
override fun onReceive(context: Context, intent: Intent) {

    // Retrieve complication values from Intent's extras.
    val extras = intent.extras ?: return
    val dataSource = extras.getParcelable<ComponentName>(EXTRA_DATA_SOURCE_COMPONENT) ?: return
    val complicationId = extras.getInt(EXTRA_COMPLICATION_ID)

    // Required when using async code in onReceive().
    val result = goAsync()

    // Launches coroutine to update the DataStore counter value.
    scope.launch {
        try {
            context.dataStore.edit { preferences ->
                val currentValue = preferences[TAP_COUNTER_PREF_KEY] ?: 0

                // Update data for complication.
                val newValue = (currentValue + 1) % MAX_NUMBER

                preferences[TAP_COUNTER_PREF_KEY] = newValue
            }

            // Request an update for the complication that has just been tapped, that is,
            // the system call onComplicationUpdate on the specified complication data
            // source.
            val complicationDataSourceUpdateRequester =
                ComplicationDataSourceUpdateRequester.create(
                    context = context,
                    complicationDataSourceComponent = dataSource
                )
            complicationDataSourceUpdateRequester.requestUpdate(complicationId)
        } finally {
            // Always call finish, even if cancelled
            result.finish()
        }
    }
}
Adding a tap action to our complication
Our BroadcastReceiver not only updates the data but also informs the system that new data is available (see the previous step). We need to add a tap action to our complication to trigger the BroadcastReceiver.
Open CustomComplicationDataSourceService.kt and move down to the onComplicationRequest() method.
Below the first Log.d() statement and above where the integer is retrieved from the DataStore, copy/paste the code below:
// Create Tap Action so that the user can trigger an update by tapping the complication.
val thisDataSource = ComponentName(this, javaClass)
// We pass the complication id, so we can only update the specific complication tapped.
val complicationPendingIntent =
    ComplicationTapBroadcastReceiver.getToggleIntent(
        this,
        thisDataSource,
        request.complicationInstanceId
    )
Recall from the previous step that we needed both these pieces of data for our BroadcastReceiver to work (the data source and the complication id).We pass both here as extras with the PendingIntent.
Next we need to assign the PendingIntent to the tap event for our complication.
Find the when statement for the ST and add this line above the .build() call.
.setTapAction(complicationPendingIntent)
The block of code should now look like this.
ComplicationType.SHORT_TEXT -> ShortTextComplicationData.Builder(
    text = PlainComplicationText.Builder(text = numberText).build(),
    contentDescription = PlainComplicationText
        .Builder(text = "Short Text version of Number.").build()
)
    .setTapAction(complicationPendingIntent)
    .build()
This only adds one line, the .setTapAction() method which assigns our new PendingIntent to the tap action for the complication.
We are done with this step. Your final method should look like this:
override suspend fun onComplicationRequest(request: ComplicationRequest): ComplicationData? {
    Log.d(TAG, "onComplicationRequest() id: ${request.complicationInstanceId}")

    // Create Tap Action so that the user can trigger an update by tapping the complication.
    val thisDataSource = ComponentName(this, javaClass)
    // We pass the complication id, so we can only update the specific complication tapped.
    val complicationPendingIntent =
        ComplicationTapBroadcastReceiver.getToggleIntent(
            this,
            thisDataSource,
            request.complicationInstanceId
        )

    // Retrieves your data, in this case, we grab an incrementing number from Datastore.
    val number: Int = applicationContext.dataStore.data
        .map { preferences ->
            preferences[TAP_COUNTER_PREF_KEY] ?: 0
        }
        .first()

    val numberText = String.format(Locale.getDefault(), "%d!", number)

    return when (request.complicationType) {

        ComplicationType.SHORT_TEXT -> ShortTextComplicationData.Builder(
            text = PlainComplicationText.Builder(text = numberText).build(),
            contentDescription = PlainComplicationText
                .Builder(text = "Short Text version of Number.").build()
        )
            .setTapAction(complicationPendingIntent)
            .build()

        else -> {
            if (Log.isLoggable(TAG, Log.WARN)) {
                Log.w(TAG, "Unexpected complication type ${request.complicationType}")
            }
            null
        }
    }
}
Run the app again
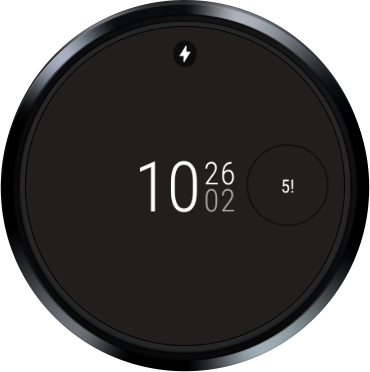
Install your app and reselect the complication, i.e., swipe the watch face, select the gear, navigate to the same complication, and select the Complications Data Source Codelab source . You should see the same thing as you saw before. However, now you can tap the complication and the data will be updated.
Summary
In this step you've learned:
- How to inform the system that your complication data has been updated
- How to tie a
PendingIntentto a tap action on your complication
Next up
Let's try supporting a different data type.
4. Exposing Long Text Data
Code step 4
As we expose our data to complications, it might be nice to support more types of data, and to see what different data types look like in complications.
Specifying a different supported data type
Open the AndroidManifest.xml file again and look at the declaration of the service CustomComplicationDataSourceService .
Change the meta-data element SUPPORTED_TYPES from SHORT_TEXT to LONG_TEXT. Your change should look like this:
<meta-data
    android:name="android.support.wearable.complications.SUPPORTED_TYPES"
    android:value="LONG_TEXT"/>
Adding support for LONG TEXT
Open CustomComplicationDataSourceService.kt, move down to the when statement in the onComplicationRequest() method, and add the following code below the end of the TYPE_SHORT_TEXT case and above the default case.
ComplicationType.LONG_TEXT -> LongTextComplicationData.Builder(
    text = PlainComplicationText.Builder(text = "Number: $numberText").build(),
    contentDescription = PlainComplicationText
        .Builder(text = "Long Text version of Number.").build()
)
    .setTapAction(complicationPendingIntent)
    .build()
The when statement should look something like this:
return when (request.complicationType) {

    ComplicationType.SHORT_TEXT -> ShortTextComplicationData.Builder(
        text = PlainComplicationText.Builder(text = numberText).build(),
        contentDescription = PlainComplicationText
            .Builder(text = "Short Text version of Number.").build()
    )
        .setTapAction(complicationPendingIntent)
        .build()

    ComplicationType.LONG_TEXT -> LongTextComplicationData.Builder(
        text = PlainComplicationText.Builder(text = "Number: $numberText").build(),
        contentDescription = PlainComplicationText
            .Builder(text = "Long Text version of Number.").build()
    )
        .setTapAction(complicationPendingIntent)
        .build()

    else -> {
        if (Log.isLoggable(TAG, Log.WARN)) {
            Log.w(TAG, "Unexpected complication type ${request.complicationType}")
        }
        null
    }
}
You may have noticed that we are simply repackaging the same data in a new format. Let's see how it looks.
How to check your progress and debug
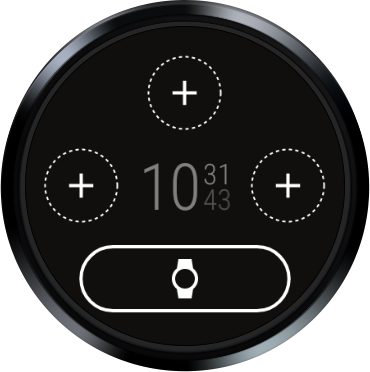
Install your service, but this time choose the bottom slot complication before choosing your complication service source :
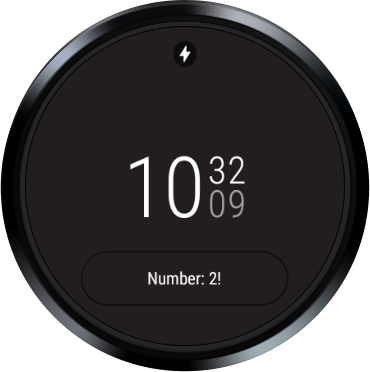
You should see something like the image below. Note that each complication is stored under a separate key, so you might see different values if you have set the complication in multiple locations:
Summary
In this step you've learned about:
- Changing and supporting different complication data types
Next up
We want to support one extra data type before putting it all together.
5. Exposing Ranged Text Data
Code step 5
While we expose our data to complications, let's continue exploring how to support more types of data.
Specifying a different supported data type
Open the AndroidManifest.xml file again and take a look at the service CustomComplicationDataSourceService .
Change the meta-data element SUPPORTED_TYPES to RANGED_VALUE. Your change should should look like this:
<meta-data
    android:name="android.support.wearable.complications.SUPPORTED_TYPES"
    android:value="RANGED_VALUE"/>
Adding support for RANGED VALUES
Ranged values can not only show text but also display a visual showing how far your value is between the minimum and maximum value. This type of complications is good for showing how much battery is left on the device or how many steps you have left to meet your goal.
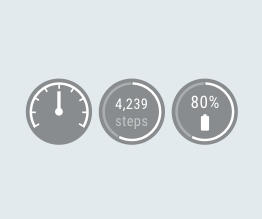
Open CustomComplicationDataSourceService .kt, move your cursor down to the when statement in the onComplicationRequest() method, and add this code under the TYPE_LONG_TEXT case and above the default case:
ComplicationType.RANGED_VALUE -> RangedValueComplicationData.Builder(
    value = number.toFloat(),
    min = 0f,
    max = ComplicationTapBroadcastReceiver.MAX_NUMBER.toFloat(),
    contentDescription = PlainComplicationText
        .Builder(text = "Ranged Value version of Number.").build()
)
    .setText(PlainComplicationText.Builder(text = numberText).build())
    .setTapAction(complicationPendingIntent)
    .build()
Your when statement should look like this:
return when (request.complicationType) {

    ComplicationType.SHORT_TEXT -> ShortTextComplicationData.Builder(
        text = PlainComplicationText.Builder(text = numberText).build(),
        contentDescription = PlainComplicationText
            .Builder(text = "Short Text version of Number.").build()
    )
        .setTapAction(complicationPendingIntent)
        .build()

    ComplicationType.LONG_TEXT -> LongTextComplicationData.Builder(
        text = PlainComplicationText.Builder(text = "Number: $numberText").build(),
        contentDescription = PlainComplicationText
            .Builder(text = "Long Text version of Number.").build()
    )
        .setTapAction(complicationPendingIntent)
        .build()

    ComplicationType.RANGED_VALUE -> RangedValueComplicationData.Builder(
        value = number.toFloat(),
        min = 0f,
        max = ComplicationTapBroadcastReceiver.MAX_NUMBER.toFloat(),
        contentDescription = PlainComplicationText
            .Builder(text = "Ranged Value version of Number.").build()
    )
        .setText(PlainComplicationText.Builder(text = numberText).build())
        .setTapAction(complicationPendingIntent)
        .build()

    else -> {
        if (Log.isLoggable(TAG, Log.WARN)) {
            Log.w(TAG, "Unexpected complication type ${request.complicationType}")
        }
        null
    }
}
Again, we are just repackaging the same data in a new format. Let's see how it looks.
How to check your progress and debug
Install your service, and choose another location.

You should now see something like this:
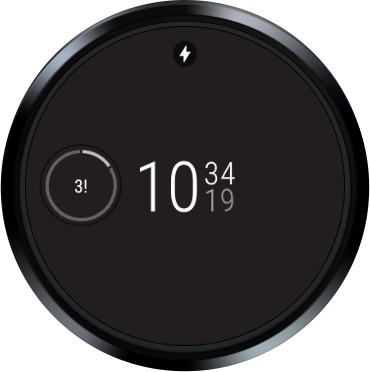
You can see a radial circle around the number that highlights the equivalent of 3/20.
Summary
In this step you've learned about:
- Changing and supporting different complication data types
Next up
We wrap up the code lab by enabling all the data type variations.
6. Exposing All Three Data Types
Code step 6
Now our complication data source supports three variations of our data (RANGED_VALUE, SHORT_TEXT, and LONG_TEXT).
In this last step, we will inform the system we support all three variations.
Specifying multiple supported data types
Open the AndroidManifest.xml file again and look at the service CustomComplicationDataSourceService .
Change the meta-data element SUPPORTED_TYPES to RANGED_VALUE,SHORT_TEXT,LONG_TEXT. Your change should now look like this:
<meta-data
    android:name="android.support.wearable.complications.SUPPORTED_TYPES"
    android:value="RANGED_VALUE,SHORT_TEXT,LONG_TEXT"/>
Check your progress
Install your service.
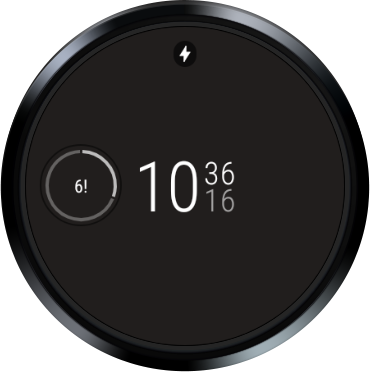
In this case, the watch face prefers the ranged data type over the short and long types, but if the complication only supported the short text type, the data would still show up because the watch face supports all three data types. Keep in mind the watch face itself specifies the data types that a complication supports, and the order of preference of those types.
Summary
In this step you've learned about:
- Supporting multiple complication data types
7. You're done! What's next?
There are many more data types you can support in complications (including small images, large images, and icons). Try to extend this code lab by implementing some of those types on your own.
For more details on developing complications for watch faces and creating complication data source s, visit Watch Face Complications
For more details about developing Wear OS watch faces, visit https://developer.android.com/training/wearables/watch-faces/index.html
